- TFMTXT2419VC_P#TFMTXT2419VCP
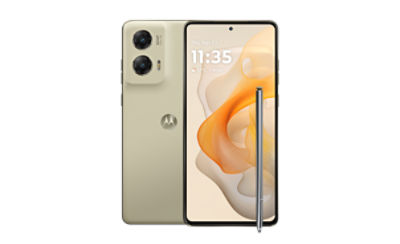
moto g stylus 5G 2024
moto g stylus 5G 2024
Out Of Stock
{{smartPay-price}}
price is #priceDollar dollar and #priceCent centssmart pay
moto g stylus 5G 2024
moto g stylus 5G 2024
Out Of Stock
Approved For {{smartPay-price}}/mo #term Monthly payments
price is #priceDollar dollar and #priceCent centsWas priced at #listPriceDollar dollars and #listPriceCent cents now priced at #priceDollar dollars and #priceCent cents
Retail Price
smart pay
This item is for pre-order only.
Ships by release date
Choose payment option
Choose purchase type

-
20 days
-
Android
-
5G Capable
-
4G LTE/Wi-Fi | 5G Connectivity (select carriers/plans) - 802.11 a/b/g/n/ac (dual band)
-
CDMA
-
6.4 x 2.9 x 0.3 inches
-
Display 6.7'' pOLED | FHD+ ; Aspect Ratio: 20:9
-
Rear Camera: 50MP + 13MP | Front Camera: 32MP
-
1 day 9 hours
-
Bluetooth V 5.1
-
Processor Qualcomm Snapdragon 6 Gen
-
GPS Enabled
-
13.6 dB with a hearing aid, and 18.2 dB without a hearing aid
-
1 day 9 hours
-
Memory: 8GB RAM, expandable up to 16GB with RAM Boost | Storage: 128GB built-in | up to 2TB microSD card expandable
-
6.7 oz
You can turn select phones into a Wi-Fi® hotspot, allowing your Wi-Fi enabled devices to connect to the internet using your mobile data connection. To enable this feature from the main screen, follow these steps:
- If Wi-Fi is enabled on your phone, turn it off by sliding the status bar down from the main screen. Tap the "Wi-Fi" icon to turn it off, then return to the Home screen.
- From the main screen, locate and tap the "Settings" icon.
- If necessary, tap "Connections" or "Network & internet."
- Tap "Hotspot & Tethering," "Mobile Hotspot and tethering," or "Tethering."
- Locate and tap "Mobile Hotspot" or "Wi-Fi Hotspot."
- Tap the slider at the top of the screen to turn this feature "On."
- Instructions for connecting other devices to your hotspot will display on your screen, including the network name and password. You will now be able to connect your devices to this network just as you would any Wi-Fi network.
To change the network name or password, follow these steps:
- Tap the appropriate text field and enter the desired network name or password.
- Note: Changing the password will disconnect any users currently connected to your personal hotspot.
- Tap "Save."
For more information, click here.
Call Forwarding is only available in select areas and on select handsets, your options may vary.
To set up Call Forwarding on your device, follow one of the options below:
OPTION 1
- From the main screen, tap the "Phone" icon.
- Tap the "Menu" icon, indicated by three vertical dots.
- Tap "Settings."
- Tap "Calls."
- Tap "Call forwarding."
- Tap the desired call forwarding option. Enter 1, followed by the area code and phone number where you would like to have your calls forwarded. Tap "TURN ON."
- Note: If there is a phone number in the number field, delete the number and replace it with the desired forwarding number. Then, tap "TURN ON" or "UPDATE."
- To disable Call forwarding, follow steps 1–5. Tap the desired call forwarding option. Then, tap "TURN OFF." Call Forwarding is now disabled, and you will receive all incoming calls on this handset.
OPTION 2
- From the main screen, tap the "Phone" icon.
- If necessary, tap the "Dial pad" icon. To enable Call Forwarding, dial *72, followed by the area code and phone number where you would like your calls forwarded.
- Tap the "Call" icon. You will hear a confirmation beep. All calls will now be forwarded automatically, and you will not receive them on this handset until Call Forwarding is disabled.
- To disable Call Forwarding, dial *73.
- Tap the "Call" icon. You will hear a confirmation beep. Call Forwarding is now disabled, and you will receive all incoming calls on this handset.
For more information, click here.
The available security options and features for your device include the following:
- Find My Device (Google)
- Screen Lock - Swipe, Pattern, PIN, or Password
- Smart Lock
- SIM Card Lock
For more information, click here.
To connect your phone to a Wi-Fi® network, follow these steps:
- From the main screen, slide the screen up to display your apps.
- Locate and tap the "Settings" icon.
- Tap "Wi-Fi." (Or, if necessary, tap "Network & internet." Then, tap "Wi-Fi.")
- If necessary, tap the slider to turn Wi-Fi on.
- A list of the available Wi-Fi networks will populate the screen. Tap the desired network.
- If necessary, enter the network password and tap "Connect" (or "CONNECT") or the "Check mark" key.
For more information, click here.
Google's "Find My Device" feature is automatically enabled when you sign in to your Google (Gmail) account on your phone. To use "Find My Device" for a lost or stolen phone, follow these steps:
- From the main screen, slide the screen up.
- Locate and tap the "Settings" icon.
- Locate and tap "Google."
- Tap "Find My Device."
- Tap the desired option to locate your phone, then follow the prompts on your screen.
For more information, click here.
More Features
No more blurry photos and shaky videos. The advanced 50MP camera system features Optical Image Stabilization (OIS) and Ultra Pixel technology for better photos day or night. Plus, capture epic ultrawide shots, professional portraits, and detailed close-ups.
Take great shots with a 50MP camera, even in low-light conditions, Ultra Pixel ensures remarkable results.
Take professional-looking headshots with a little gloss with Portrait mode.
Get every detail into epic ultrawide shots and capture what your eyes see.
Get the group pic everyone will approve with the 32MP front camera.
The Macro Vision lens gets 4x closer to your subject, so you see every detail.
{{itemname}}
{{prop1}}
{{prop2}}
{{itemprice}} [x{{itemquantity}}]
{{itemname}}
{{prop1}}
{{prop2}}
{{itemprice}}


